Capstone II: Progress Blog #4
- Daniel Nacianceno
- Nov 6, 2020
- 4 min read
We made significant progress on the Bag Valve Mask Compression Attachment in terms of the structure of the controller code and the physical setup of the device. At the time of the previous blog, the user interface was clunky and allowed the user to go out of bounds to combinations of Inhalation and Exhalation that do not exist within the code or that don’t make physical sense such as 11:3 or 2:70. As of now, we changed the code now it’s more streamlined to include only two options; Tidal Volume and IE Ratio. We combined the previous I and E rows into one single row since the I values were all 1 for our purposes, as seen in Figure 1. The only variable that would change when the user scrolls through is the Exhalation time (E).

Figure 1. New Menu Setup with Three Rows instead of Four
The new menu setup reduces the time needed to begin the operation, with minimum and maximum values set for the TV and I:E ratio. Having three rows instead of four would also be more time-efficient, as less rotations and pressing of the knob will be needed. The OLED display has now been finalized for the BVM attachment.
At first, the code allowed the user to select the Tidal Volume, Inhalation, and Exhalation. The Inhalation settings we chose all have a value of 1, so being able to choose any other value would be useless. We planned a way to reconfigure this such that the user could only choose the Exhalation by combining the “I” and “E” rows into one, as shown in Figure 1. Also, in the old code, the user was able to move past the 300 to 700 mL settings of Tidal Volume to settings that did not exist. After some thought and experimentation, some skillfully placed “else if” statements within the void loop sections of the code did the trick. A similar solution was used to lock the range of possible Exhalation times to be from 2 to 4. Some more manipulation of the setup of the LED screen led to the current iteration of the code.
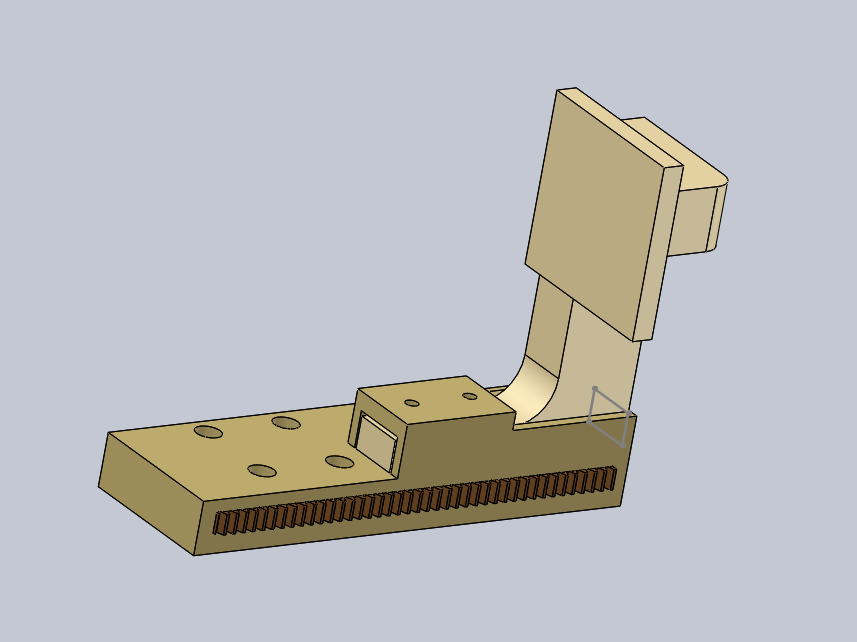
The physical layout of the device was altered somewhat over the past couple of weeks. At first, as originally planned by the first Solidworks plans, the knob and LED screen, positioned directly on the breadboard, was placed on a separate platform in front of the bag. We decided that it was uncomfortable to press the knob’s button in this position, and thus repositioned the knob and screen on the top side of the device both to protect the circuit and to make the interface more immediately accessible. (Figure 2)

Figure 2: New position of the user interface on top of the device.
The final modifications have been made to the housing and layout of the prototype. Compared to the original design, the size and weight of the device have been reduced. The knob and OLED screen are no longer on a breadboard; they are now secured to the top of the device, not in the way of the BVM like before, making it easier to access.
Modifying the aesthetics of the housing took longer than expected. A piece of wood was blocking the way for the new placement of the breadboard, prompting us to chop it away without cutting into the baseboard. Since the team did not have a manual saw during this time, the jigsaw was used to cut the piece of wood. (Figure 3) There was not enough clearance for the jigsaw to be able to have the cut, causing us to have to remove the wooden walls to have easier access to the border. The clamps also had to be disassembled temporarily for the jigsaw to have space to cut the pegwood board in front of the housing, where the BVM was in the way.

Figure 3. Team 7 Members working Diligently on Reconfiguration of several Key device elements
As mentioned previously, the housing of the prototype had to be disassembled to make clearance for the jigsaw, where the breadboard would be placed. The team cut out excessive material and streamlined the overall appearance of the prototype, making it more portable and user-friendly.
Once the aesthetics of the housing and the 1:4 I:E ratio calibration is complete, the prototype will then be validated in other parameters such as robustness and durability, then presented to several health-care professionals to see the potential usage of our device in different scenarios. For example, if the device could even qualify for ventilation purposes in adults or if the BVM attachment could be used in ambulances or emergency situations, and if not, what could be changed to make the device work under these circumstances. The team will also ask if any improvements should be made to the structure, relating to size, weight and material without reducing the quality of the housing. It is possible to have underlooked something important, so the team may allot any spare time they have after to tweak and modify the device.

Comments